Customize the look and feel of your series to set up your series for success
The Series Settings page lets you control how your editions are sent and displayed. Access it by clicking the gear icon in the top right corner of your series workspace. Settings are organized into four pages: Share, Strategy, Design, and Delete.
Features marked with a ⭐ require an upgrade from the Essential Package. Review our packages here.
Table of contents:
- Share page:
- Strategy page
- Design page
- Delete page
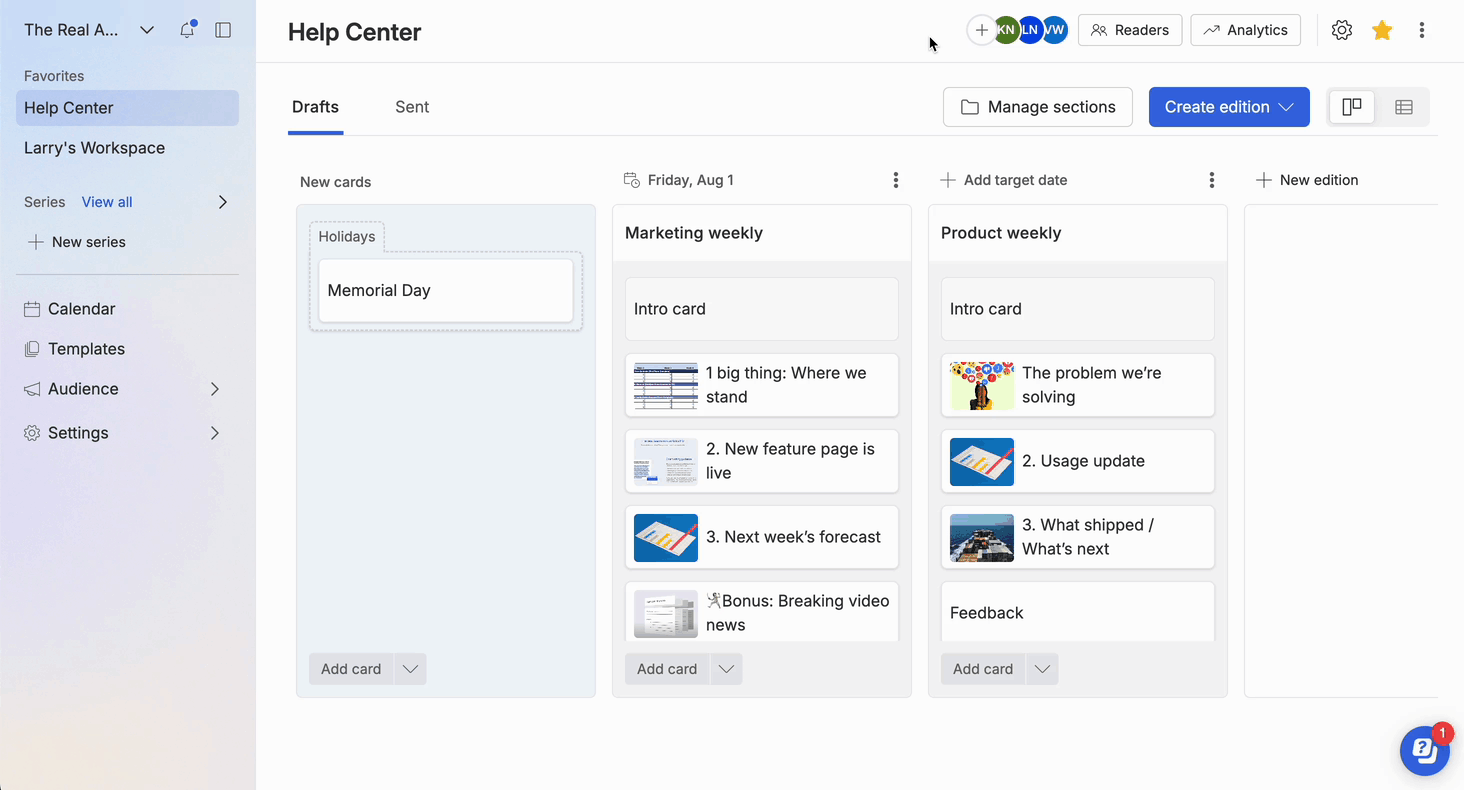
1. Share page
Send as
You have the option to modify both the sender name and the reply-to email address. If your organization has a custom domain configured, you can also select additional send-from email addresses.
🛠️ How it works:
- Navigate to the Series settings page by clicking on the gear icon in the top right corner.
- In the Send as section of the Share page, you will be able to edit the sender name, reply-to address, and send-from address.
- The sender name is the name that appears in your recipient's inboxes.
- The reply-to email address is the address at which you will receive manual replies to your series.
-
The send-from email address is the email that appears in your recipient's inboxes if you have set up a custom domain with Axios HQ.
- ❗Certain send-from addresses may be locked by your account Admins. If you have access to a specific send-from address, you will see it in the send-from dropdown.
- If you do not have access to a specific send-from address, you have the option to send from your own email address or noreply@customdomain.com.
- OOO and automatic replies will go to the send-from email address and not the reply-to address. We recommend using an alias/made up email address as the send-from email address if you are concerned that the automatic replies will go to a real inbox.
-
The reply-to email address will also serve as the sender email address if a custom domain is set up.
- If you do not have a custom domain, your recipients will receive the series from noreply@axioshq.com.
- If you'd like to set up a custom domain with Axios HQ, reach out to your account manager! You can check out a short explanation on our Custom Domain integration here.
- Make sure to Save changes.
💡 Out of office replies and auto-replies will go to the send-from address.
Link access
Manage who can read this series on the web. Each sent edition has a link that you can copy and share.
🛠️ How it works:
- Navigate to the Link access section of the Share page in your Series settings.
-
Each sent edition has a link that you can copy and share. Select between the three link access options.
- Recipients only: Only the people who were sent an edition can view it on the web.
- Recipients and current audience: In addition to recipients, everyone in the current audience can access all past editions.
- Anyone with the link: Your content will be publicly viewable on the web for anyone to access with the link.
- You can copy the Series web link by clicking on "Copy web link".
- By default, all series will be set to 'Recipients only'.
- Make sure to Save changes.
Subscription preferences
Manage how readers subscribe and unsubscribe from this series.
🛠️ How it works:
- Navigate to the Subscription details section of the Share page in your Series settings.
-
For Series sign-up:
- Check the box to turn on the link and it will begin to generate.
- Once the link is ready, you can copy and share it on your website or other platforms.
- Anyone with any email can be added to your series audience list.
-
For Unsubscribe link:
- Check the box to turn on the Unsubscribe link. It will be included at the bottom of each edition.
- You can review unsubscribed recipients on your Readers page.
2. Strategy page
Series details
Give your readers extra info about your series.
🛠️ How it works:
- Navigate to the Series details section of the Strategy page in your Series settings.
- Here you can change the name of your series.
- The series name change will reflect on the left side panel and at the top of your workspace for that series.
- Make sure to Save changes.
Cadence
Cadence automatically creates new editions on a recurring basis. You can create a Cadence for any series in your Workspace.
🛠️ How it works:
- Navigate to the Cadence section of the Strategy page in your Series settings.
- You can set your cadence to create a new edition on a daily or weekly recurrence at your desired time.
-
To create an edition in advance, check the box. You can choose how many days before your target date you would like the draft created.
- You can choose to create a Blank edition, Last sent edition, or from your templates.
- Make sure to Save changes.
Reminders
Keep things on track with email notifications.
🛠️ How it works:
- Navigate to the Reminders section of the Strategy page in your Series settings.
- Check the box to enable or disable Send edition reminders. You can customize the number of days before the target send date that you want to receive notifications.
- Check the box to enable or disable Overdue notifications. You'll receive an email notification if your edition is 24 hours overdue from its target send date.
- Make sure to click Save changes.
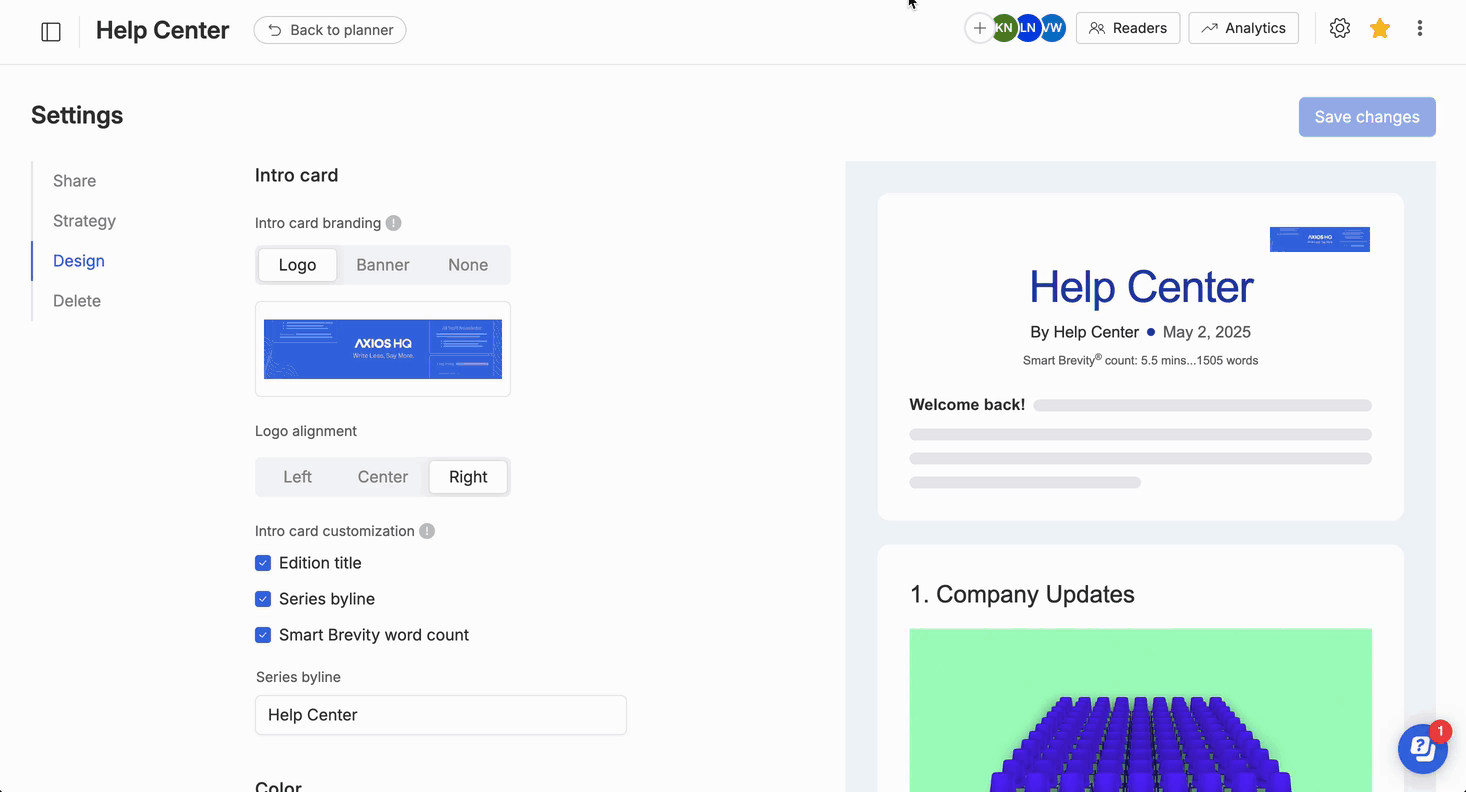
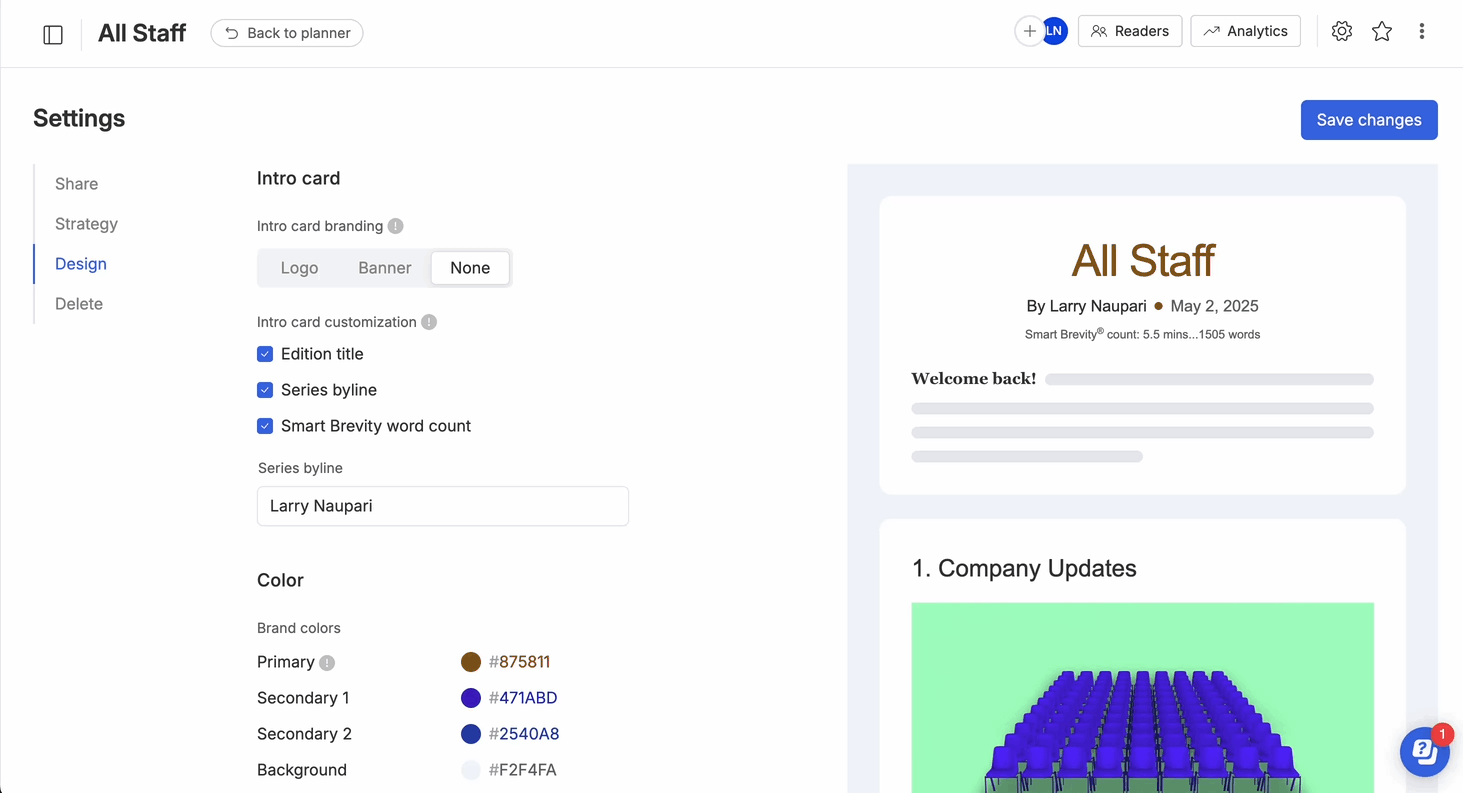
3. Design
Intro card
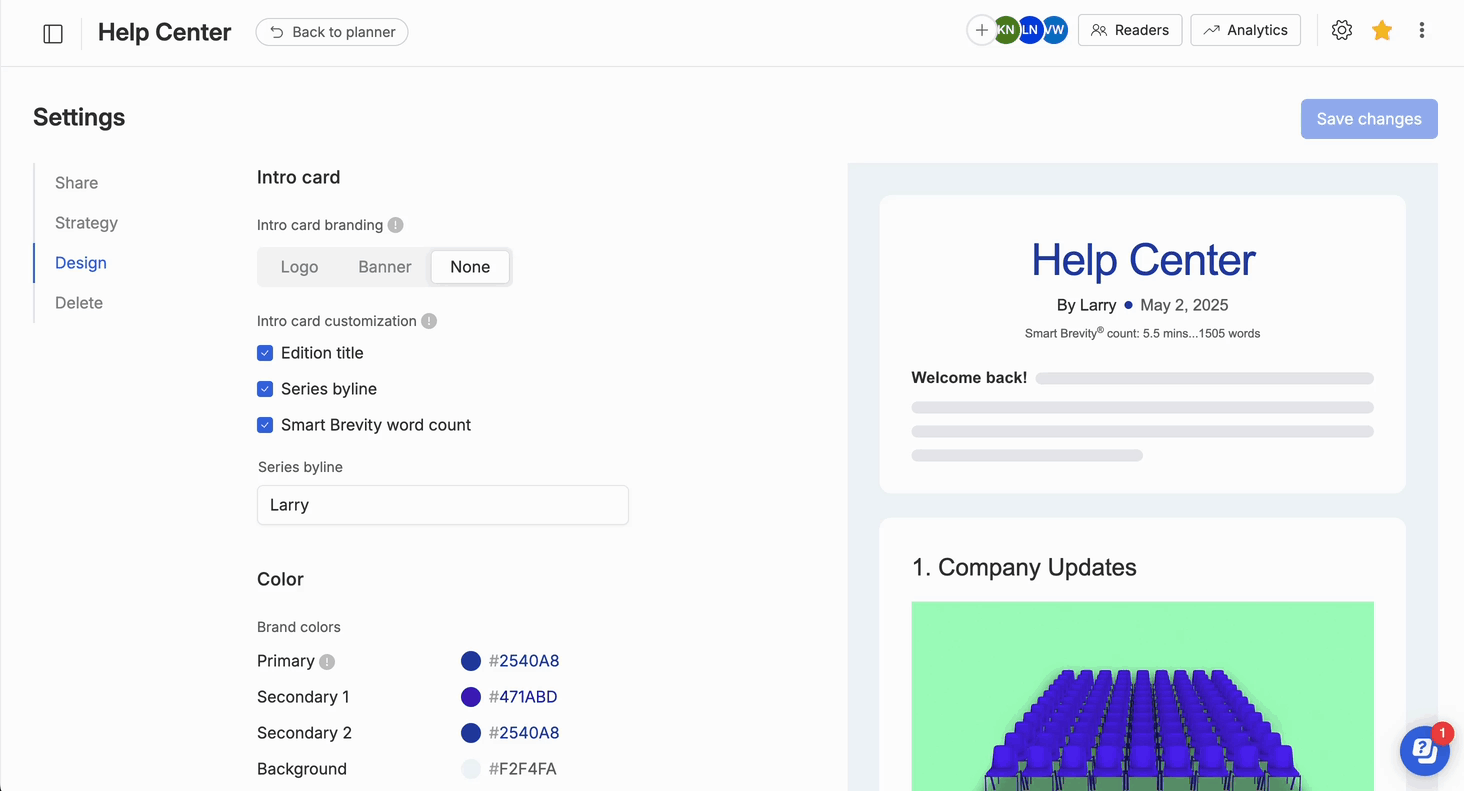
🛠️ How it works:
- Navigate to Intro card section of the Design page in your Series settings.
-
Click 'Upload' to upload a banner/logo, or you can have none.
- For Logos, you can choose to have it Left, Center, or Right aligned.
-
You can customize your intro card by choosing if you want to show/hide Edition title, Series byline, and Smart Brevity word count. Check the box of each one you want to include in your intro card.
- The byline indicates who wrote the series and appears in every edition's intro card.
- Editing your byline in the Series settings page will be applied to all future drafts.
- Make sure to Save changes.
💡 You can also edit the title, byline, and subject line directly in your edition's intro card. Those changes will only apply to the specific edition that was edited.
Color
🛠️ How it works:
-
Navigate to Color section of the Design page in your Series settings.
- Your selected primary color will be used for the title, block quotes, and polls.
- Your selected primary and secondary colors can be used for buttons and text.
- The background colors that populate are based on the primary color.
- Make sure to Save changes if you make adjustments to your settings.
⭐ Users can set up custom fonts by submitting a request here.
Want to upgrade your package? Reach out to your Account Manager or help@axioshq.com to learn more!
Fonts
We have ten built-in fonts available for you to use in your edition. The default Header and Body fonts are Arial (sans-serif) and Georgia (serif).
🛠️ How it works:
- Navigate to your Series settings by clicking on the gear icon in the top right corner, then click the Design page.
- Scroll down to the Font section.
- Select Header and Body font from the list of fonts.
- Save changes and navigate to your edition to view selected fonts live.
Font compatibility can vary by operating system. Specifically, Calibri and Aptos are not included by default on Mac OS, and Helvetica and Palatino might not function reliably on Windows OS. For recipients to view a specific font in their inbox, that font must be installed on their device. If the font is missing, the email display will revert to default Serif or Sans Serif fonts.
Footer
Collect anonymous or identified feedback from your audience and add a custom footer, including text and links to social media.
🛠️ How it works:
- To turn on/off Feedback:
- Navigate to Footer section of the Design page in your Series settings.
- Toggle "Feedback" on to include the feedback block in your editions.
- Toggle "Feedback" off to disable the feedback block.
- Toggle "Collect individual emails" to enable identified feedback.
- Use the Feedback text box to add customized text to your feedback block.
- View feedback responses in your edition analytics under the Responses tab.
- 💡 The reader will see the following copy to understand their information will be shared: Your email will be recorded with your response and shared with the sender.
- To add a Custom footer:
- Navigate to Footer section of the Design page in your Series settings.
- Toggle 'on' the Custom footer.
- Select the social media icons that you would like to appear and insert the links for each. If you do not want to include icons, proceed to the next step.
- Insert the text you would like in your footer. You can bold, italicize, and hyperlink any text. Hit "Enter" on your keyboard to create space between lines of text.
- Use the Live preview section to test your links and preview exactly how it will look in your email.
- Send a test to yourself to confirm and see your footer in action.
4. Delete page
Delete series
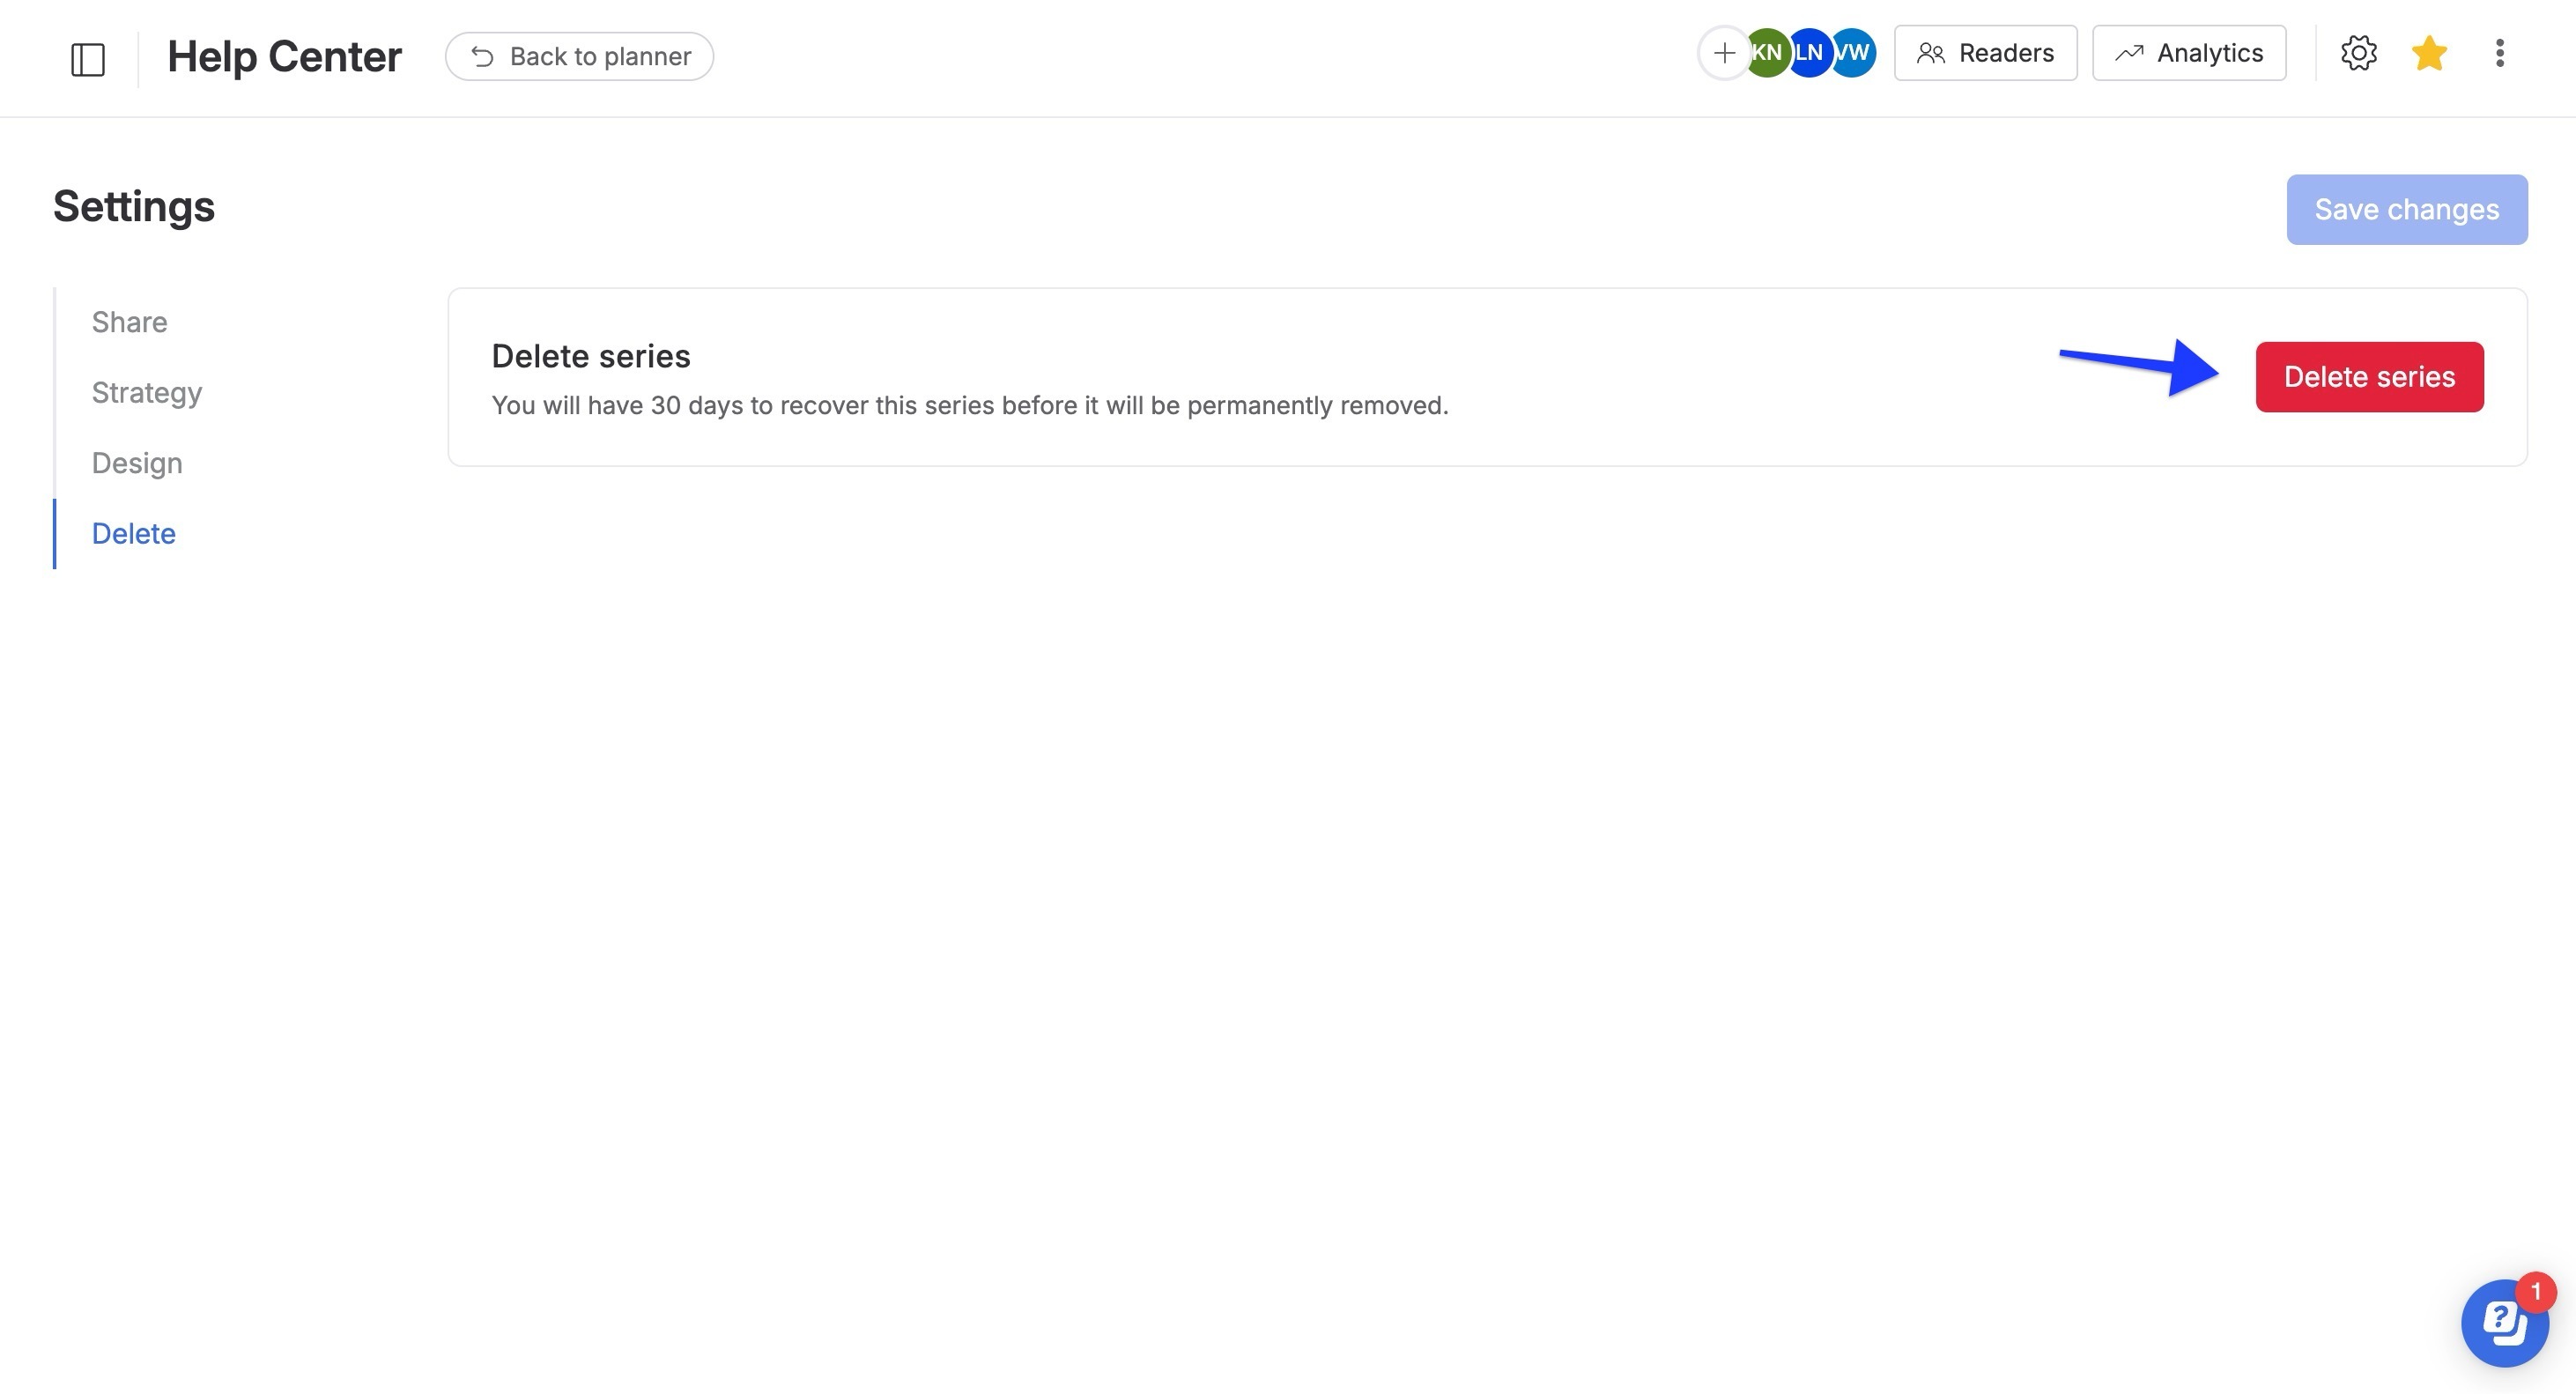
🛠️ How it works:
- Navigate to Delete section of the Delete page in your Series settings.
- Click "Delete series."
- You will have 30 days to recover this series before it will be permanently removed.